
In this post, I will go through in detail how to buy an NFT at Opensea using Metamask. This is a complete beginner’s guide that goes through every step of the process. Thus, it’s a guide that you can follow successfully even if you have not previously used Metamask or Opensea.
To buy an NFT for the first time at Opensea using Metamask, you need to complete the following steps: Set up a Metamask account and connect it to your web browser, visit Opensea and find the NFT you want to buy, load Metamask with Ethereum, connect Metamask to Opensea, click “Buy” at Opensea, and confirm the transaction at Metamask. You can now see your NFT at Opensea if you clikck the “My Collection”-tab.
Ok, after this short summary, let’s now get into the meat of the matter! We’ll first outline the main steps you have to go through to buy your first NFT with Metamask at Opensea. Then, I will describe each of these steps in full detail.
Ok, let’s start!
The 7 steps of buying an NFT at Opensea with Metamask
- Start by setting up a MetaMask account and connecting it to your web browser. This will allow you to interact with the Ethereum blockchain and make purchases on OpenSea.
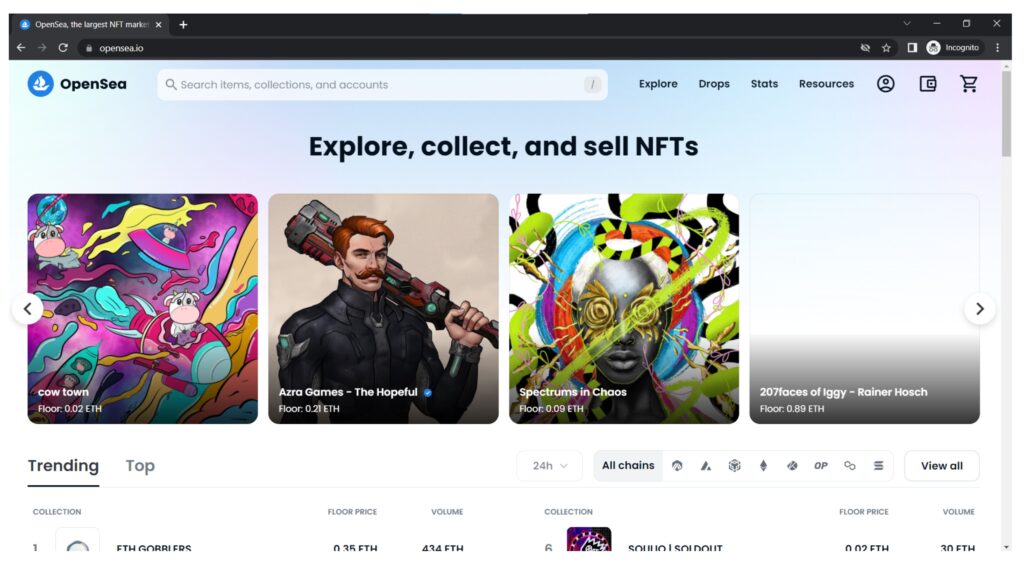
- Next, visit the OpenSea website and browse through the available NFTs. When you find an NFT you want to purchase, click on it to view more details.
- Before you can make a purchase, you’ll need to make sure you have enough Ethereum in your MetaMask account to cover the cost of the NFT. If you don’t have enough Ethereum, you can buy some on a cryptocurrency exchange such as Coinbase or Kraken.
- Once you have sufficient funds in your MetaMask account, click the “Buy” button on the NFT page to start the purchase process.
- MetaMask will open a window asking you to confirm the transaction. Check the details to make sure everything looks correct, then click “Confirm.”
- The transaction may take a few minutes to process. Once it is complete, you will see a notification in MetaMask and the NFT will be added to your OpenSea collection.
- Congratulations, you are now the proud owner of your first NFT! You can view and manage your NFT collection by clicking on the “My Collection” tab on the OpenSea website.
Note: It’s always a good idea to do your own research and due diligence before making any purchases in the crypto space, including NFTs. Make sure you understand the risks and potential drawbacks of buying NFTs, and never put anything more in than you can afford to lose!
By the way, read this post if you’re curious about wether you always need cryptocurrency when buying NFTs.
Setting up MetaMask account and connecting it to web browser

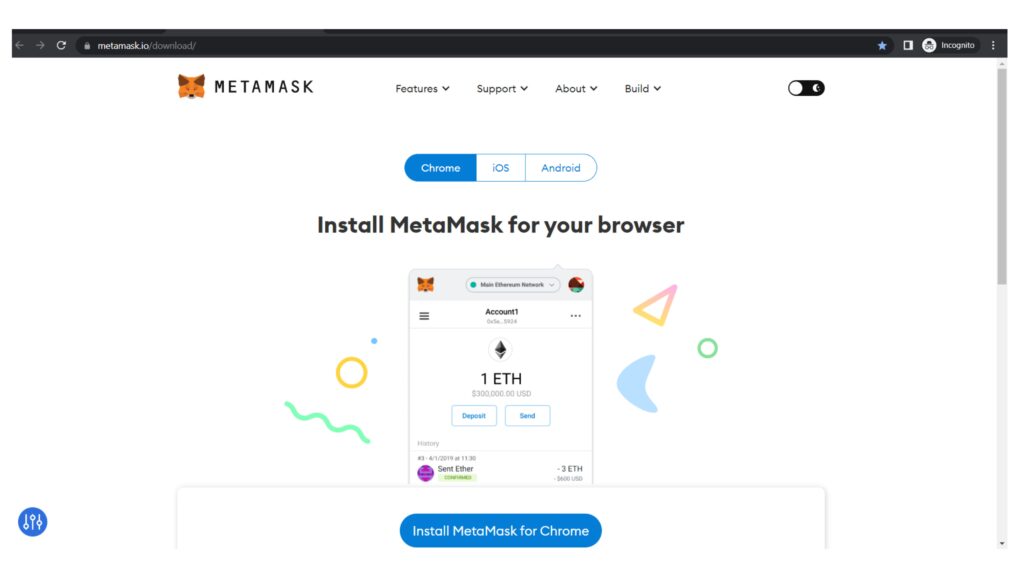
- Start by visiting the MetaMask website. From there, click on the “Get MetaMask” button. This will take you to the page where you can download the MetaMask extension for your web browser.
- Once the extension is installed, click on the MetaMask icon in your browser to open it. You will see a welcome screen with a button to “Create a Wallet.” Click this button to begin the process of creating your MetaMask account.
- You will be asked to create a strong password for your account. Make sure to choose a password that is difficult to guess and that you will remember.
- After you have created your password, MetaMask will generate a seed phrase for you. This seed phrase is a series of words that you will use to restore your MetaMask account if you ever lose access to it. It is extremely important that you keep this seed phrase in a safe place, as anyone who has access to it will be able to access your MetaMask account.
- Once you have written down your seed phrase, click “Next” to continue. You will be asked to confirm your seed phrase by selecting the words in the correct order.
- After you have confirmed your seed phrase, your MetaMask account will be created and you will be taken to the dashboard. From here, you can manage your Ethereum accounts, view your transaction history, and interact with the Ethereum blockchain.
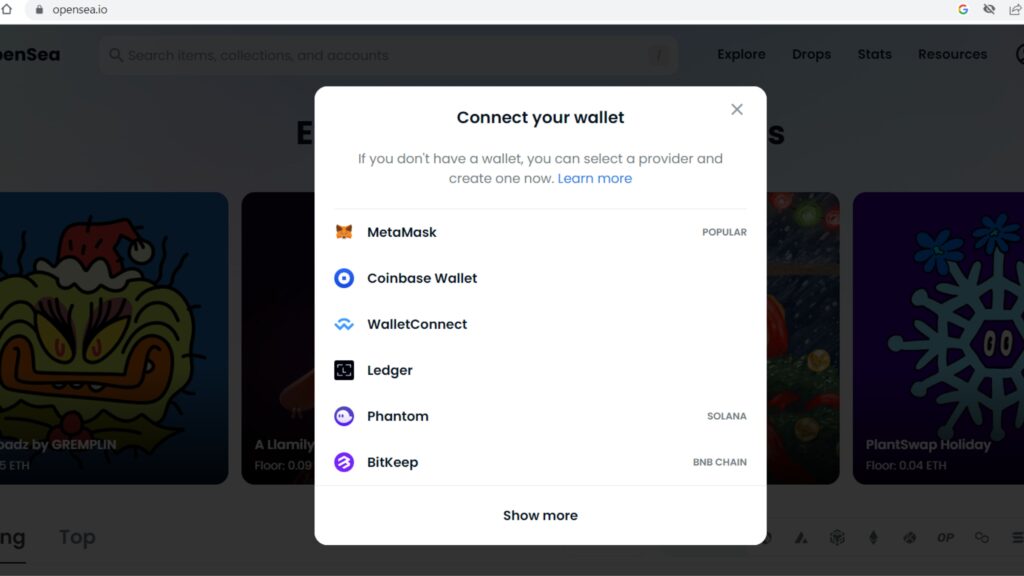
- To connect your MetaMask account to a web application such as OpenSea, simply visit the application’s website and click on the “Connect to MetaMask” button. This will allow you to use your MetaMask account to make purchases and interact with the application.
Ok, that was the process. So, you should now be set up and ready to use MetaMask to interact with the Ethereum blockchain, and make purchases on OpenSea and other web applications.
How to browse and find NFTs on OpenSea
Now you need to go to the Opensea webpage. To view more details about an NFT, click on its listing to open its page. On this page, you will see a description of the NFT, as well as its current price and ownership information. You can also view images or videos of the NFT, if available.
If you want to see more NFTs from a particular creator or in a particular category, you can use the filters on the left side of the page to narrow your search. For example, you can filter by creator, category, or price range to find NFTs that meet your specific criteria.
You can also view other information about the NFT, such as its transaction history, by clicking on the “Transactions” tab on the NFT page. This can be useful if you want to see how the NFT has been bought and sold in the past.
Once you have found an NFT you want to purchase, click on its listing to view more details. From here, you can click the “Buy” button to start the purchase process, as described in step 4 of this guide.
Making sure there’s enough ETH in MetaMask to cover NFT cost
If you don’t already have any Ethereum in your MetaMask account, you’ll need to buy some on a cryptocurrency exchange. There are many exchanges available, such as Binance, Coinbase, or Kucoin. To buy Ethereum, you’ll need to create an account on the exchange and follow their instructions for depositing funds and buying cryptocurrency.
Once you have bought Ethereum and it has been credited to your exchange account, you’ll need to transfer it to your MetaMask account. To do this, open MetaMask and click on the “Add Token” button. From the list of available tokens, select Ethereum (ETH) and click “Next.” You will be shown a list of your Ethereum accounts, each with its own address. Copy the address for the account you want to transfer your Ethereum to, and then go back to your exchange account.
Please note: Newly installed Metamask wallets that use the latest version available should have the ETH token icon automatically installed. However, if it was not installed on your wallet, then follow the instructions I provided above.
On the exchange, you’ll then need to find the “Withdraw” or “Send” option and paste in the Ethereum address you copied from MetaMask. Follow the exchange’s instructions to complete the transfer. It may take a few minutes for the Ethereum to arrive in your MetaMask account.
Once you have Ethereum in your MetaMask account, you’re ready to make a purchase on OpenSea. Just make sure you have enough Ethereum to cover the cost of the NFT you want to buy. You can view your Ethereum balance by clicking on the “Accounts” tab in MetaMask.
Ok, so if you followed these steps correctly, you should now have enough Ethereum in your MetaMask account to cover the cost of an NFT on OpenSea!
Starting purchase process of NFT on OpenSea using MetaMask
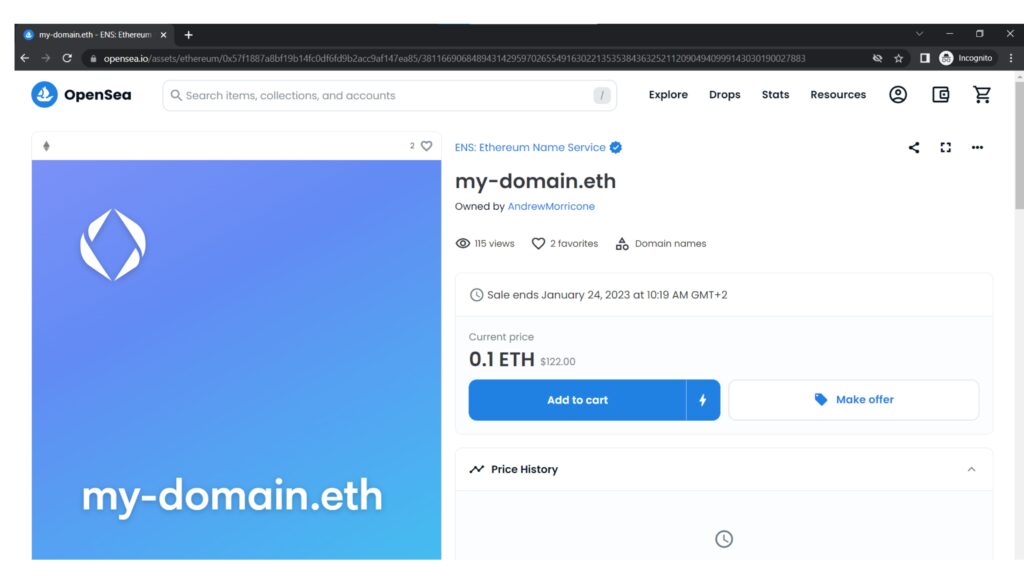
To begin, visit the OpenSea website and browse through the available NFTs until you find one you want to purchase. Click on the NFT’s listing to view more details. Then, if you choose to buy an NFT, you need to click the “Buy” or “Add to Chart” button.
This will open a window in MetaMask asking you to confirm the transaction. The window will show you the details of the transaction, including the cost of the NFT in Ethereum, the address of the seller, and the address of the recipient (which will be your MetaMask account).
Before you confirm the transaction, it’s important to double-check the details to make sure everything is correct. If you see any errors or discrepancies, do not confirm the transaction. Instead, contact the seller or OpenSea support for assistance.
If the details of the transaction look correct, click “Confirm” to complete the purchase. MetaMask will show you a notification that the transaction is being processed. This may take a few minutes, as the transaction needs to be verified and added to the Ethereum blockchain.
Once the transaction is complete, you will see a notification in MetaMask and the NFT will be added to your OpenSea collection. You can view and manage your NFT collection by clicking on the “My Collection” tab on the OpenSea website.
After confirming NFT-transaction at OpenSea with MetaMask

While the transaction is being processed, you can track its progress by viewing the “Pending Transactions” tab in MetaMask. This tab will show you the status of the transaction, as well as its transaction hash (a unique identifier for the transaction).
Once the transaction has been verified and added to the blockchain, it is considered complete. You will see a notification in MetaMask indicating that the transaction has been confirmed, and the NFT will be added to your OpenSea collection.
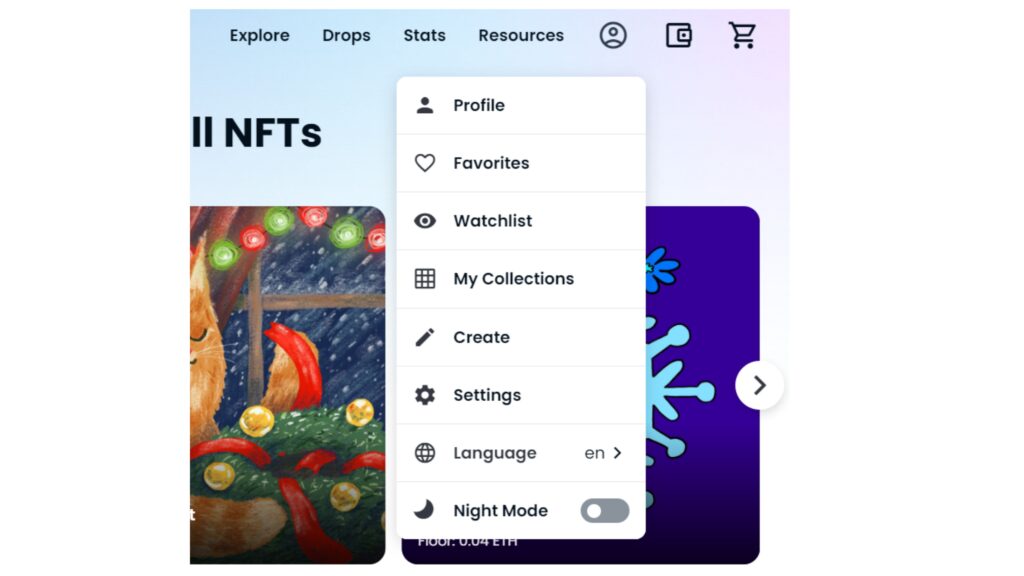
You can view and manage your NFT collection by clicking on the “My Collection” tab on the OpenSea website. From here, you can view details about each NFT in your collection, such as its name, description, and ownership information. You can also view the transaction history for each NFT, as well as any other actions you can take with the NFT (such as selling or transferring it to another user).
How to view and manage your NFT collection on OpenSea
On the “My Collection” page, you will see a list of all the NFTs in your collection, along with their names, images, and other details. You can click on an NFT to view more details about it, such as its description, ownership information, and transaction history.
You can also perform various actions with your NFTs from the “My Collection” page. For example, you can sell an NFT by clicking the “Sell” button and following the prompts to list the NFT for sale on the OpenSea marketplace. You can also transfer an NFT to another user by clicking the “Transfer” button and entering the recipient’s Ethereum address.
In addition to viewing and managing your NFT collection on the OpenSea website, you can also view your collection using a compatible wallet or application. For example, you can use a wallet such as MyEtherWallet or Cipher to view and manage your NFT collection, as well as interact with the Ethereum blockchain in other ways.
The final step in purchasing NFT on OpenSea with MetaMask
As the owner of an NFT, you have certain rights and responsibilities. For example, you can sell or transfer your NFT to another user if you wish, or you can hold onto it as a long-term investment. You can also view and manage your NFT collection on the OpenSea website or using a compatible wallet or application.
Final words
That’s it! By following these steps, you can successfully purchase your first NFT on OpenSea using MetaMask. Enjoy your new NFT, and happy collecting!
Just a final note: Please keep in mind that putting money into NFTs, like any investment, carries risks and potential drawbacks. Do make sure you understand the risks, and do your own research and due diligence before even thinking of taking the step toward making any moves. Also, never put in more than you can afford to lose.
Robin
Author: Robin Olsson
Author Bio: I’m Robin and on this website, I share everything I’ve learned since getting into NFTs in 2021. I have a background in research and I’ve been in crypto for several years. You can read more about me here.


?")